


Best Stains for Pine and How to Choose One

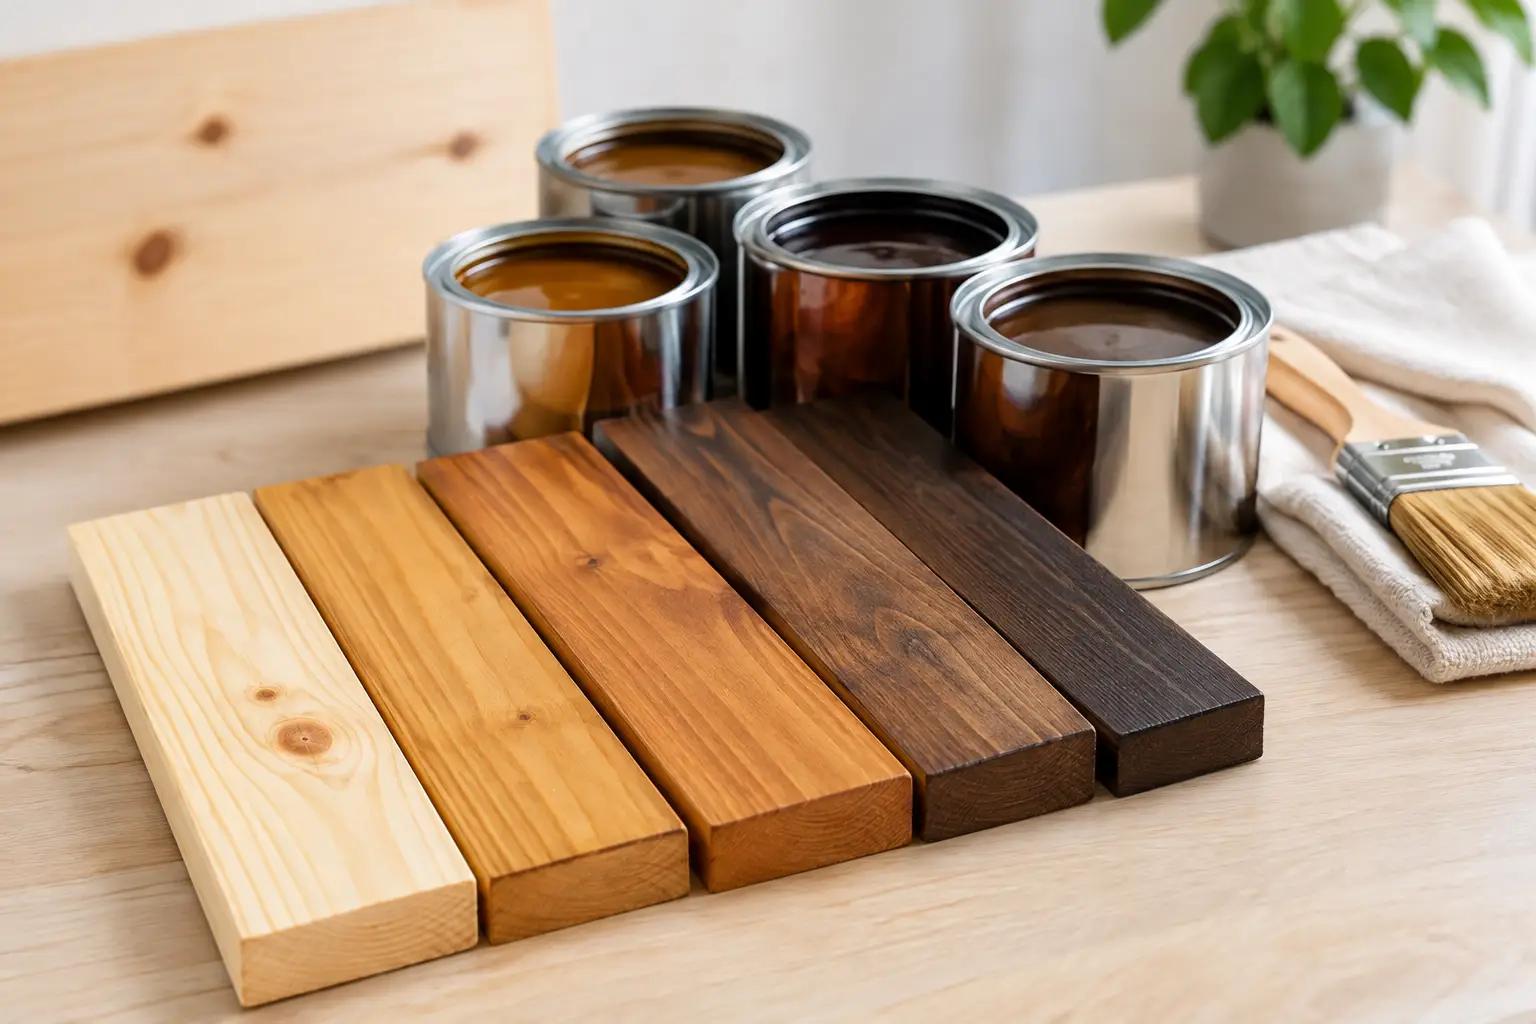
Pine can look warm, clean, and beautifully understated, or it can turn blotchy, orange, and far darker than expected. Choosing the best stains for pine starts with accepting what makes this wood different: its soft earlywood absorbs stain quickly while its denser grain resists it. The right color matters, but the product type and preparation matter just as much.
For a pine tabletop, built-in, cabinet, floor, or reclaimed furniture piece, begin with the finished look you want and work backward. A lighter stain can preserve pine’s casual character, while a medium or dark tone can make affordable boards feel more refined. Either way, test first. Pine is one of the least forgiving woods for judging stain from a color chip alone.
Why Pine Stains Differently Than Other Woods
Pine is a softwood with uneven porosity. The lighter sections between grain lines can pull in a heavy load of pigment, while knots and denser areas take very little. That is why a single coat of conventional penetrating stain may look pale in one spot and nearly black in another.
Knotty pine adds another consideration. Knots contain resin, which can interfere with adhesion and may bleed through lighter finishes or clear topcoats over time. If knots are prominent, seal them with a shellac-based knot sealer before staining or finishing. This is especially worthwhile on trim, cabinetry, and furniture that will see plenty of daylight.
The goal is not always to eliminate every variation. Some homeowners want a more natural, rustic result where grain and knots remain visible. For a cleaner, more consistent furniture-grade look, use a pre-stain wood conditioner or choose a gel stain that sits more evenly on the surface.
Best Stains for Pine by the Look You Want
The best choice depends on whether you want pine to look like pine, resemble another species, or simply work with the rest of the room. These color families are reliable starting points, provided you prepare and test the wood properly.
Natural, clear, and lightly warmed pine
Clear protective finishes, natural-toned stains, and very light honey shades are ideal when you want to retain the fresh character of pine. They work well on cottage furniture, beadboard, casual shelving, and walls where the wood is part of the design.
There is a trade-off: pine naturally deepens to a warmer amber tone as it ages. An oil-based clear finish tends to accelerate that warmth. If you prefer a more neutral or pale appearance, choose a water-based stain and water-based clear coat with low ambering characteristics. A light whitewash or pickled stain can also soften yellow tones while leaving the grain visible.
Golden oak and warm medium brown
Golden oak, early American, and medium walnut shades are among the easiest ways to give pine warmth without making it look overly dark. These colors suit traditional furniture, stair parts, interior trim, and rooms with warm white walls, beige textiles, or honey-toned flooring.
On raw pine, medium browns often read more orange than they do on oak. A conditioner helps, but a sample board is still essential. If the test looks too warm, move toward a neutral brown or a stain with a touch of gray rather than applying a darker coat of the same orange-leaning shade.
Walnut and dark brown stains
Walnut is a popular choice for pine because it adds contrast and can make basic boards feel more substantial. It is a strong option for desks, dining tables, fireplace mantels, and statement shelving. Dark walnut, espresso, and deep brown stains also help minimize the visual impact of knots.
The caution is blotching. The darker the pigment, the more obvious uneven absorption becomes. For best results, sand evenly, apply wood conditioner according to the label, and wipe the stain consistently. Gel stain is often the safer option for a rich dark finish because it gives you more control over color build.
Weathered gray and driftwood tones
Gray stains can give pine a contemporary, coastal, or reclaimed-wood effect. They are especially effective for accent walls, benches, barn-style doors, and pieces intended to work with black hardware or cool-toned decor.
Not every gray is truly gray on pine. Some can turn blue, green, or lavender depending on the wood’s natural yellow undertone. A weathered gray or brown-gray color usually looks more balanced than a pure cool gray. For a softer, aged appearance, consider a light gray stain topped with a matte clear coat rather than trying to force full opacity with multiple stain coats.
Whitewash and pickled finishes
Whitewash stains brighten pine while preserving visible grain, making them a practical choice for small rooms, ceilings, paneling, and Scandinavian-inspired furniture. They are not designed to hide knots or strong color variation. Instead, they make those details feel intentional.
For the most even result, use a white or light neutral stain specifically made for wood, then protect it with a non-yellowing water-based topcoat. Avoid applying a warm oil-based polyurethane over a whitewashed finish if your goal is a crisp pale color.
Choosing the Right Stain Formula
Stain color is only half the decision. The formula affects how easily you can control the result, how quickly the project moves, and how durable the completed piece will be.
Oil-based penetrating stains offer long working time and rich color, which can be useful on larger pieces or detailed grain. They are a familiar choice for floors, trim, and traditional woodworking. They also tend to have a stronger odor and longer dry time, so ventilation and patience are part of the job.
Water-based stains dry quickly, clean up with soap and water, and are available in a wide range of colors. They are well suited to indoor furniture and projects where low odor and faster recoating matter. Their fast dry time means you need to maintain a wet edge and work methodically to avoid lap marks.
Gel stains are often one of the best stains for pine when uniformity is the priority. Their thicker consistency limits deep absorption, so they can reduce blotching and build color more predictably. They are particularly useful for vertical surfaces, knotty boards, previously finished pieces after proper preparation, and dark color transformations.
For exterior pine, select an exterior-rated semi-transparent or solid stain designed for the exposure level of your project. Deck boards, fencing, siding, and outdoor furniture need UV and moisture protection, not just a pleasing color. A transparent interior furniture stain will not provide the protection an exterior surface requires.
How to Stain Pine Without the Blotches
Good prep makes more difference on pine than adding an extra coat of stain. Start by sanding with the grain and removing mill glaze, scratches, and old finish. For most new pine, work through 120- and 150-grit sandpaper, then stop around 180 grit. Sanding too fine can reduce absorption, while leaving coarse scratches can make the stain look muddy.
Remove all sanding dust with a vacuum and a clean lint-free cloth. If you use a damp cloth, let the wood dry completely before moving on. Dust left in the grain can create uneven color and a rough final finish.
Next, apply a pre-stain wood conditioner if you are using a penetrating stain. Follow the product’s timing instructions carefully. Conditioner is not a guarantee of perfect uniformity, but it significantly reduces harsh dark patches. If you are using gel stain, conditioner may not be necessary, though a test board will tell you more than a rule of thumb.
Apply stain in manageable sections, working with the grain. Let it sit only as long as the manufacturer recommends, then wipe off excess evenly with a clean cloth. Do not assume a second coat will fix a too-light result. On pine, additional coats can exaggerate unevenness. If you need a deeper tone, a gel stain or a tinted finishing system may be a better route.
Once the stain is fully dry, protect it with a compatible clear coat. Use polyurethane, water-based polyurethane, varnish, or another project-appropriate topcoat based on where the piece will live. Tabletops, floors, and high-touch furniture need more protection than decorative wall paneling. Lightly sand between coats when the product directions call for it.
Always Make a Pine Sample Board
Use offcuts from the same boards as the project whenever possible. Sand them exactly as you plan to sand the finished piece, then test the conditioner, stain, and clear coat as a complete system. The topcoat can noticeably deepen the color, particularly over medium and dark stains.
Label each sample with the product and number of coats. Compare it in the actual room during daylight and at night under your installed lighting. This small step prevents the expensive disappointment of staining an entire floor, cabinet run, or dining table in a color that only looked right under store lighting.
For reliable stain, conditioner, topcoat, brushes, pads, sanding supplies, and practical project advice in one order, Oui Colour Paint can help you build the right finishing system. Bring a sample or a clear photo of the wood if you need help narrowing down a color.
Pine rewards a measured approach. Test the tone, control absorption, and choose protection that suits how the surface will be used. The result can look intentional and durable rather than like a quick compromise.
